How to Identify and Replace a Refrigerator Capacitor?
A refrigerator is essential in maintaining food freshness. However, it can malfunction due to various reasons. One common issue involves the refrigerator capacitor. This small component plays a vital role in the refrigerator's function. It helps start the compressor and run it efficiently.
Over time, the refrigerator capacitor might wear out or fail. Recognizing the signs of a faulty capacitor can save you time and money. For instance, listen for unusual noises or observe if the compressor runs intermittently. These hints can mean trouble.
Identifying and replacing a refrigerator capacitor is manageable with some guidance. Taking action early can prevent further damage. However, not everyone feels confident in handling electrical components. It can be intimidating, yet understanding the basics is crucial. So, let’s explore how you can assess and replace that refrigerator capacitor.
Understanding the Function of a Refrigerator Capacitor
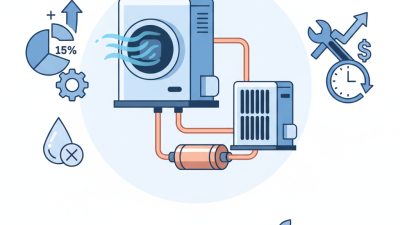
A refrigerator capacitor plays a crucial role in the appliance's functionality. It stores electrical energy and releases it as needed. This boosts the compressor's performance when starting up. Without it, the refrigerator may fail to operate efficiently. According to a report by the Appliance Repair Industry, nearly 30% of refrigerator issues stem from faulty capacitors.
Understanding this component often helps in troubleshooting. A capacitor typically has a lifespan of about 10-15 years. Over time, heat and wear can cause it to underperform. Visible signs of a failing capacitor include bulging or leaking. Catching these signs early can save costly repairs. Technicians often recommend periodic inspections as part of routine maintenance.
Homeowners may overlook the significance of capacitors. Many assume that cooling issues arise only from the compressor. However, this misconception can lead to delays in repairs. Statistics reveal that replacing a failed capacitor can restore 50% of refrigerator issues. Immediate action often resolves problems without needing a full appliance replacement.
Signs That Indicate a Faulty Refrigerator Capacitor
When a refrigerator capacitor fails, it leads to several noticeable symptoms. One common sign is an unusual humming or buzzing noise. This noise often indicates that the compressor is struggling to start. A refrigerator that frequently cycles on and off could also point to capacitor issues. Each time the compressor starts, it may cause a jarring sound.
Another red flag is inconsistent cooling. If some areas of the fridge are warm while others are cold, the capacitor may not be providing enough power to the compressor. Additionally, an increase in energy bills can hint at underlying capacitor problems. A faulty capacitor can cause the compressor to work harder, thus consuming more energy.
Sometimes, there might be visible signs of damage. Leaking or bulging on the capacitor casing suggests a serious issue. Users should approach these signs with caution. Ignoring the symptoms may lead to more significant refrigerator problems. Checking the capacitor might save time and money in the long run, even if it feels daunting at first. Understanding these signs can lead to timely repairs and better appliance performance.
How to Identify and Replace a Refrigerator Capacitor? - Signs That Indicate a Faulty Refrigerator Capacitor
| Signs of a Faulty Capacitor |
Possible Causes |
Recommended Actions |
| Refrigerator not starting |
Capacitor failure |
Test capacitor with a multimeter and replace if defective |
| Unusual humming noise |
Capacitor unable to provide adequate power |
Inspect and consider replacing the capacitor |
| Frequent cycling on and off |
Weak capacitor |
Check voltage supply; if stable, replace capacitor |
| Increased energy bills |
Inefficient functioning |
Evaluate capacitor and other components for efficiency |
| Capacitor bulging or leaking |
Old or damaged capacitor |
Replace immediately to avoid further damage |
Step-by-Step Guide to Testing a Refrigerator Capacitor
Testing a refrigerator capacitor is essential for proper appliance function. The capacitor stores and releases electrical energy to start the compressor. A faulty capacitor can lead to the compressor failing to start or running inefficiently. According to industry reports, about 20% of refrigerator malfunctions are linked to capacitor issues. Knowing how to test it is crucial.
To test a refrigerator capacitor, first, unplug the fridge. Safety comes first. Use a multimeter set to the capacitance measurement mode. Connect the probes to the capacitor terminals. A healthy capacitor should show readings within 10% of its rated capacitance. You should notice something interesting. Bad capacitors may display a significantly lower reading or no reading at all.
If the capacitor fails the test, it’s time to replace it. Ensure you buy a capacitor that matches the specifications. Installation should be done carefully. Poor installation can lead to more issues down the road. Industry data shows that improper replacements can cause additional repairs in 15% of cases. Sometimes, it's easy to overlook this stage. Attention to detail can prevent further complications.
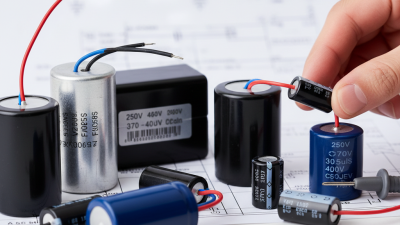
Capacitor Voltage Ratings for Refrigerators
How to Safely Remove and Replace a Faulty Capacitor
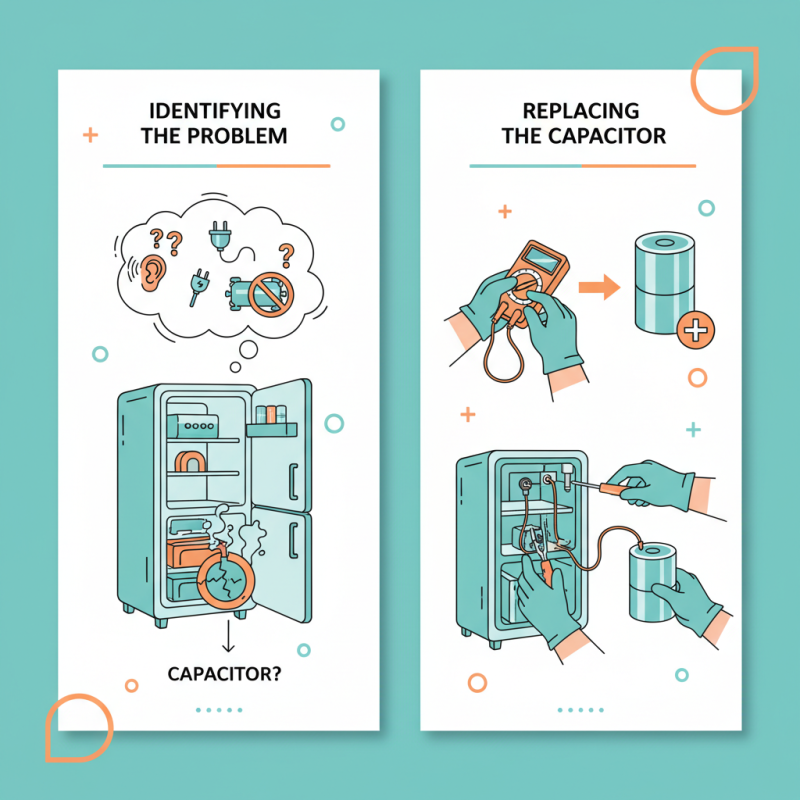
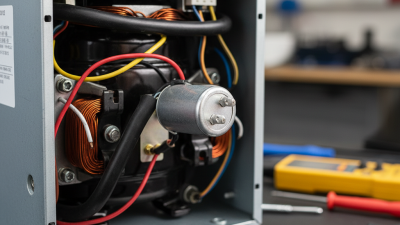
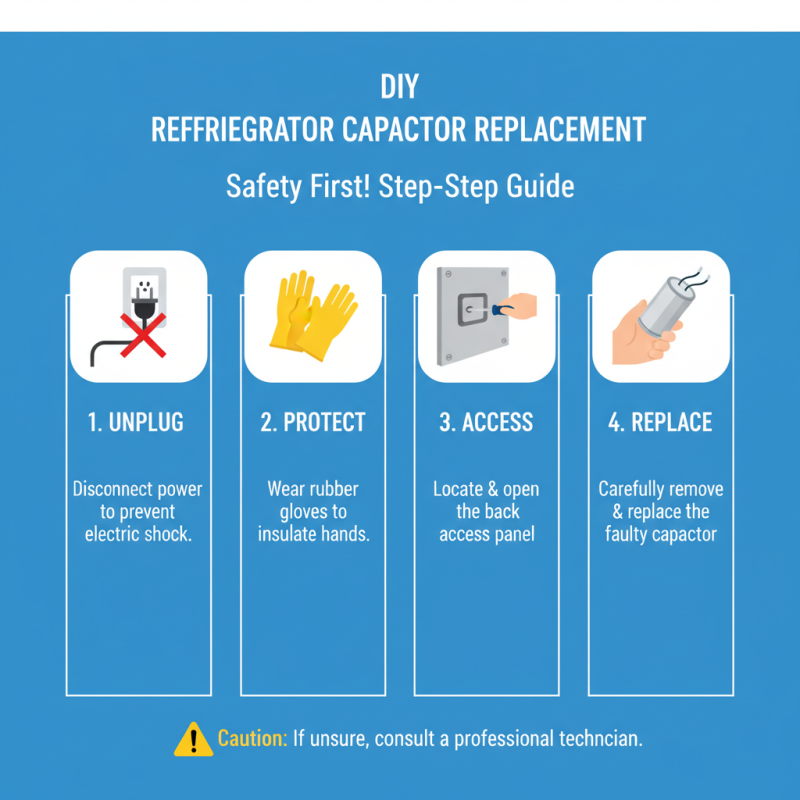
Removing and replacing a faulty capacitor can be a daunting task. It's crucial to ensure safety first. Start by unplugging the refrigerator. This simple step prevents electrical shocks. Wear rubber gloves to protect your hands. Using a screwdriver, open the access panel. It can be tricky; patience might be required.
Once you locate the capacitor, carefully inspect it. Look for signs like bulging or leaking. These are clear indicators of failure. Take a moment to remember its original position. Take a picture if you're unsure. Remove the wires connected to it. This requires gentle handling to avoid damaging them. When detaching, mark each wire to ensure proper reconnection.
Install the new capacitor in the same orientation. Turn your attention to reconnecting the wires. Ensure they fit snugly. Loose connections can lead to repeat failures. Once everything is secured, close the access panel. Plug the refrigerator back in and check its operation. If it doesn’t work, you might have missed a step. Don’t hesitate to revisit your connections. Each detail matters in this DIY repair.
Reassembling and Testing Your Refrigerator After Replacement
Reassembling your refrigerator after replacing the capacitor can feel daunting. Begin by ensuring all tools are at hand. A screwdriver and a multimeter are essential. Carefully reattach the panels. Align them properly with the edges. A misaligned panel can lead to future issues.
Once reassembled, it’s crucial to test your work. Plug in the refrigerator and listen closely. It should run quietly. A humming sound is normal, but a rattling noise signals a problem. Use the multimeter to check the capacitor’s voltage. Ensure it matches the required readings. If the refrigerator doesn’t work, revisit each connection. Sometimes, a loose wire can cause frustration.
Patience is vital during this process. Accept that mistakes can happen. If a connection feels off, take a breath and double-check. Each step matters. Your precision and care will lead to a well-functioning refrigerator. Celebrate small victories, even when faced with challenges.